MAAX APEX 96 8 FT Manuel d'utilisation
Page 4
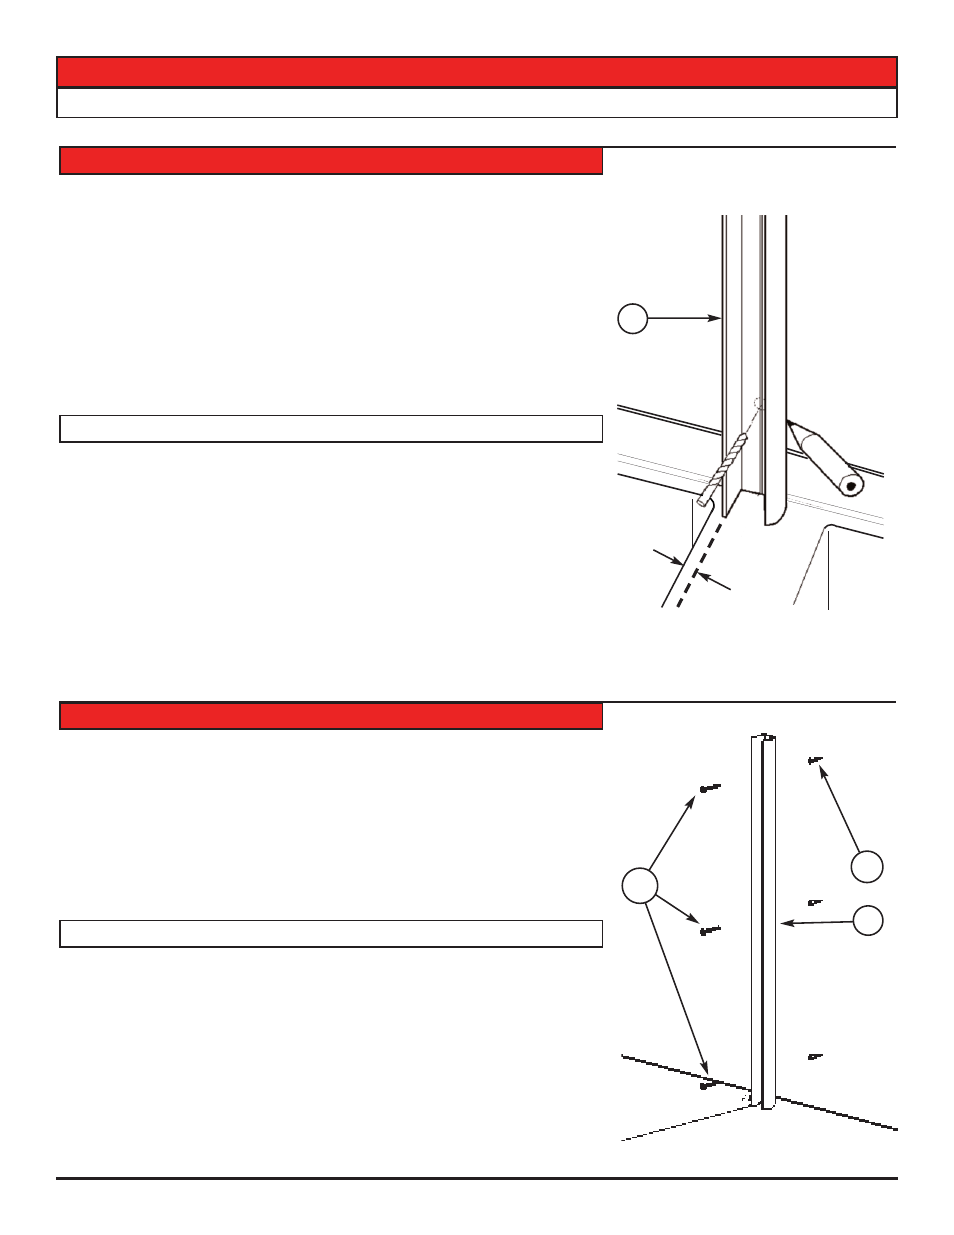
a- Place the shorter of the two wall jambs (A) 1/8” away from the inside edge of the
shower.
b- Level vertically, and mark position on wall.
c- Drill holes through wall jamb and the wall at three locations (top, middle, bottom).
Drill bit:
- Ceramic tile wall: 7/32” (5.5 mm) carbide bit.
- Plastic wall: 1/8” (3.2 mm).
Note: The round end of the wall jamb is to sit on the bath tub.
a- Placez le plus court des deux montants muraux (A) à 1/8” de la bordure interne de
la douche.
b- Alignez-le verticalement à l’aide d’un niveau et marquez sa position au crayon sur le
mur.
c- Percez des trous à trois emplacements au travers du montant et du mur (haut,
milieu, bas) avec la mèche appropriée.
Mèches:
- Pour céramique: 7/32 (5.5 mm) au carbure.
- Pour plastique: 1/8 (3.2 mm).
N.B.: Le bout arrondi du montant mural doit reposer sur le pourtour du bain.
a- Insert plastic plugs (FF), into wall if necessary.
b- Fix wall jamb (A) with screws (CC).
a- Insérez les chevilles de plastique (FF) dans les trous si nécessaire.
b- Fixez le montant mural (A) avec les vis (CC).
ÉTAPE 2 - MONTANT MURAL POUR PANNEAU LATÉRAL
STEP 2 - WALL JAMB FOR SIDE PANEL
ÉTAPE 1 - MONTANT MURAL POUR PANNEAUX LATÉRAL
STEP 1 - WALL JAMB FOR SIDE PANEL
4
A
Guide d’installation
Installation Instructions
1/8”
FF
A
CC