Installation instructions, Warning, Install cooktop – Maytag MGC7536WS Installation Manuel d'utilisation
Page 7
7
INSTALLATION INSTRUCTIONS
Install Cooktop
Decide on the final location for the cooktop. Avoid drilling into or
severing existing wiring during installation.
Gas On Glass Cooktop models only:
1. Using 2 or more people, place the cooktop upside down on a
covered surface.
2. Remove foam strip from the package containing literature.
Remove backing from foam strip. Apply foam strip adhesive-
side down around bottom of cooktop, flush with edge.
NOTE: The foam strip helps avoid damage to the underside
of the cooktop glass from debris and helps the cooktop sit
flat on uneven counters.
3. Place cooktop right side up into the cutout.
NOTE: Make sure that the front edge of the cooktop is
parallel to the front edge of the countertop. If repositioning is
needed, lift entire cooktop up from cutout to avoid scratching
the countertop.
MGC7430/7536 models only:
1. Determine whether your cabinet construction provides
clearance for installing clamping brackets at cooktop base
ends. This is the recommended location. Clamping brackets
can be installed on the front and back of cooktop base
bottom, if necessary.
2. Using 2 or more people, place cooktop right side up into the
cutout.
NOTE: Make sure that the front edge of the cooktop is
parallel to the front edge of the countertop. If repositioning is
needed, lift entire cooktop up from cutout to avoid scratching
the countertop.
3. Remove the attachment screws for the selected bracket
locations from the bottom of the cooktop base.
4. Attach brackets to cooktop base bottom with bracket
attachment screws. Securely tighten screws.
A. Cooktop base
B. Foam strip
C. Cooktop
WARNING
Excessive Weight Hazard
Use two or more people to move and install cooktop.
Failure to do so can result in back or other injury.
A
B
C
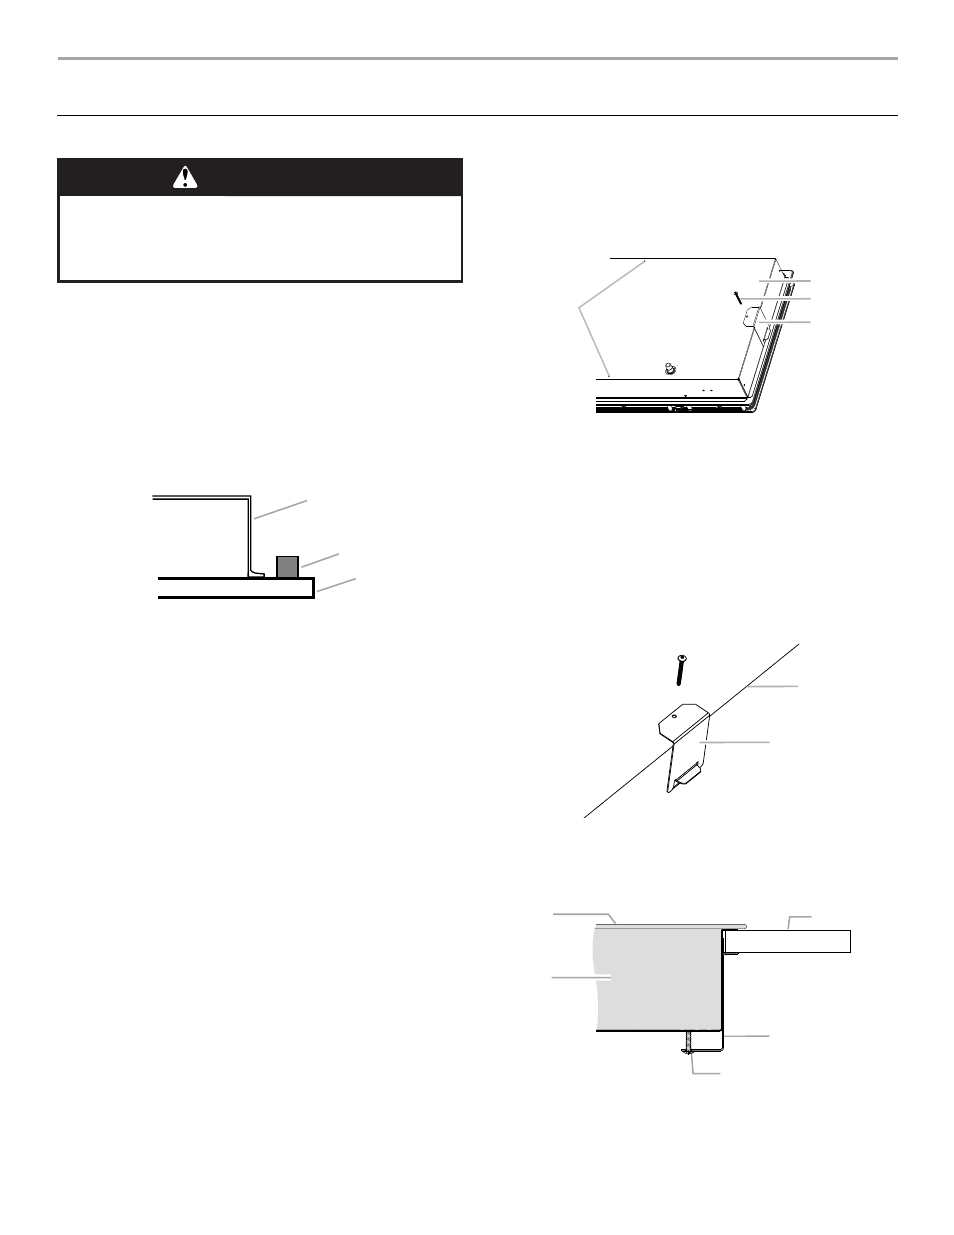
A. Attachment screw holes for optional front and back location
B. Cooktop base bottom
C. Attachment screw
D. Clamping bracket (end locations recommended)
A. Edge of cooktop base bottom
B. Clamping bracket
A. Cooktop
B. Cooktop base
C. 2" (5.1 cm) bracket attachment screw
D. Clamping bracket (extends far enough beyond
cooktop base to allow installation of clamping screws)
E. Countertop
B
C
C
D
A
A
B
A
B
C
D
E