Softening the water, Installation – DE DIETRICH VW300EI Manuel d'utilisation
Page 4
GB
5
Softening the water
Filling the container with
regenerating salt (fig. 5)
Filling with salt is essential for the regeneration
of the resins that soften the water so removing
the hardness from it, except if the water supply
is already sufficiently soft. (see “Adjusting the
water softener).
You should fill just before starting the
programme.
1 - Unscrew and remove the salt container cap.
2 - Use a funnel to pour: fill the container with
regenerating salt specially designed for
dishwashers.
3 - The first time, fill up with water up to the
top of the container.
Screw down the salt container cap again
properly.
Important: If adjusting the water softener does
not require the addition of regenerating salt
(Hardness range 0),
you should
nevertheless fill the salt container with
water before using.
Never pour detergent into the container,
you will destroy the water softener
Only use “special dishwasher” rege-
neration salt. Do not use table salt, cooking
salt, etc. These salts can contain insoluble
elements and will cancel out the effect of the
softener.
Identifying the regenerating salt
level
A light on the control band tells you to add
regenerating salt.
4
GB
Installation
Free-standing model
You can use the top of the machine as a worktop.
You are advised not to place the dishwasher too
close to a source of heat, or the edging of the
worktop may be damaged.
The machine can be built in. In that case, see
page 11.
Levelling : Adjusting the feet (Fig. 4)
Make sure that the machine is properly upright
and stable. The four feet may be altered, adjust
them if necessary using a wrench or a
screwdriver. Badly adjusted feet may move the
door off centre and make the machine unstable.
IMPORTANT:
Do not connect the dishwasher
to the power or water supply before
completing installation.
If you are installing your dishwasher on carpet,
adjust the feet so that you leave space for air to
circulate underneath the machine.
Soundproofing apron (Fig 15)
(on some free-standing models)
For optimum soundproofing, make sure the apron
delivered with the machine is correctly installed.
Having adjusted the feet for height :
- Tilt the dishwasher backwards slightly so as to
clip the apron onto the bottom of the plinth.
Make sure it is correctly clipped at both ends
and the centre.
- Adjust the height of the apron; snip the end with
a pair of scissors and cut one or more strips off
it by hand.
The apron should touch the floor.
Connection to the water supply (Fig. 2)
Unless otherwise indicated on the original pipe,
never connect your dishwasher to a hot water
supply.
Use the water supply pipe supplied with the
machine. The water pressure may vary from 1 to
10 bar. In the event of high pressure, it is
advisable to fit a pressure regulator. Your Water
Company will give you the necessary information.
Protection against water damage
• The anti-overflow safety device. The system
automatically activates the drain pump if the
water level in the tub rises too high.
• Anti-leakage device. This system interrupts the
water supply if a leak is detected underneath the
machine.
If one of these mechanisms is started, contact the
after-sales service to put it back into working
order.
Evacuating waste water (Fig.3)
Connect the drain pipe
A With a ventilated siphon. The drain pipe should
be free in the siphon and should be no deeper
than 20 cm.
B The sink U-bend. Attention : do not forget to
remove the siphon cover.
C Directly into the sink.
Be careful to fix the drain pipe down to avoid
flooding.
In any case, the end of the pipe must be between
60 cm and 1 m high.
Avoid folding the pipe when installing.
Supply pipe length : 1,50 m
Connecting to the power supply
You should use an earthed plug to connect to
the power supply. In case of a direct
connection, the main switch terminal should be
at least 3 mm apart.
Replacing the electric lead
: WARNING :
In the interests of safety, the electrical supply
lead should ONLY be replaced by the
manufacturer’s after-sales staff or a similarly
qualified person.
Your dishwasher should be fitted so that the
plug is always accessible. Do not use an
extension lead or multiple plug for connection
to the electric socket.
* We cannot be held liable for any damage
caused by the faulty earthing of the
machine.
In all cases, the connection must comply with
the standards in force in the country
concerned, together with the supplementary
regulations of the Electricity Authority.
The protection system and the model of the
machine are marked on the plate on the inside
of the door on the left. The machine must be
switched off when the connection is made to
the electrical circuit.
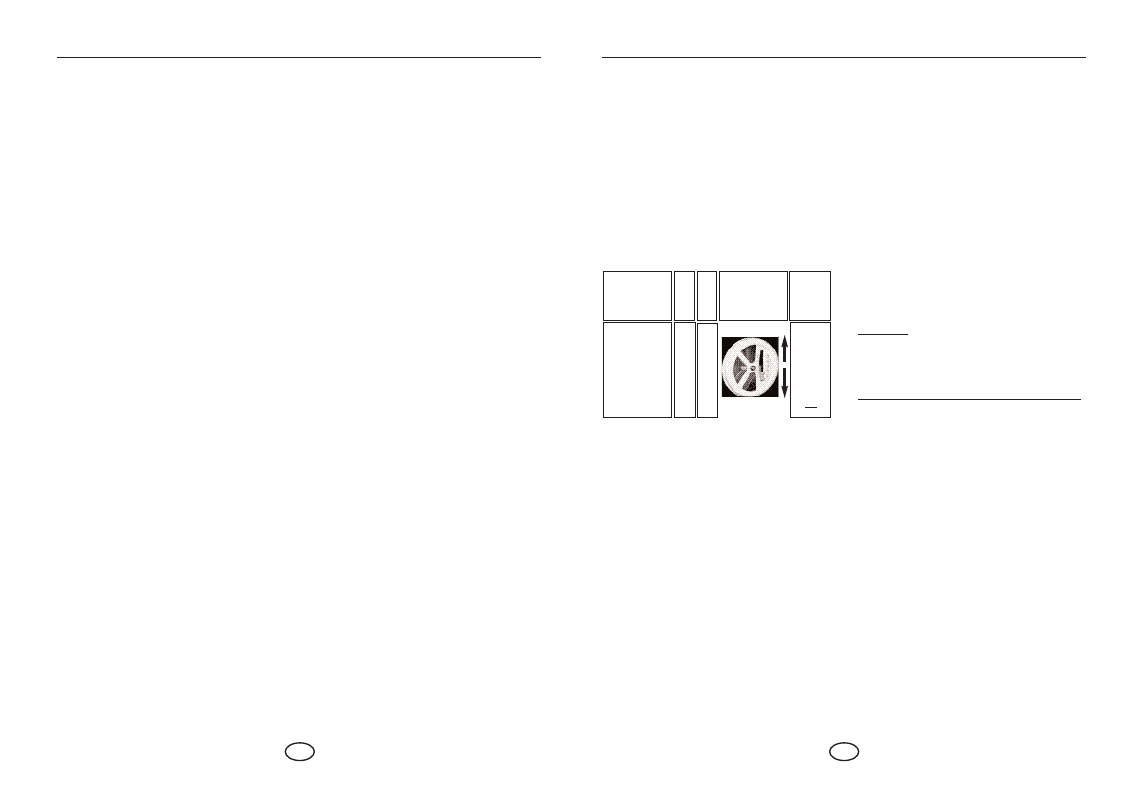
Adjusting the water softener
The water softener should be properly
adjusted to optimise salt consumption and for
best washing results.
• Check the hardness of the water using the
water-testing strip provided.
• Adjust the water softener following the
instructions with the strip and using the table
opposite.
• Consult your fitter for water that is more
than 28° (position 5)
If you move or your water supply changes,
adjust the water hardness settings. Check with
your local water company.
Hardness of your
water supply (in
British (clarke
degrees)
> à 28°
*
22° to 28°
14° to 21°
10.5° to 14°
7° to 10.5°
0° to 7°
YES
YES
YES
YES
YES
NO
Adjust the cursor
depending on the
result to the
adjustment position
on the left of the tub.
5
4
3
2
1
1
salt
requirements
Position
Number of
washes
between
two fills
(about)
20
30
50
120
Important : The cursor must be in front of a figure