Multi-Contact MA259 Manuel d'utilisation
Page 5
Advanced Contact Technology
www.multi-contact.com
5 / 8
PV-KO3 I+II
40 mm min.
11
12
13
14
15
10
Indus trie alk ohol
Indus tria l a lcohol
alcool indus triel
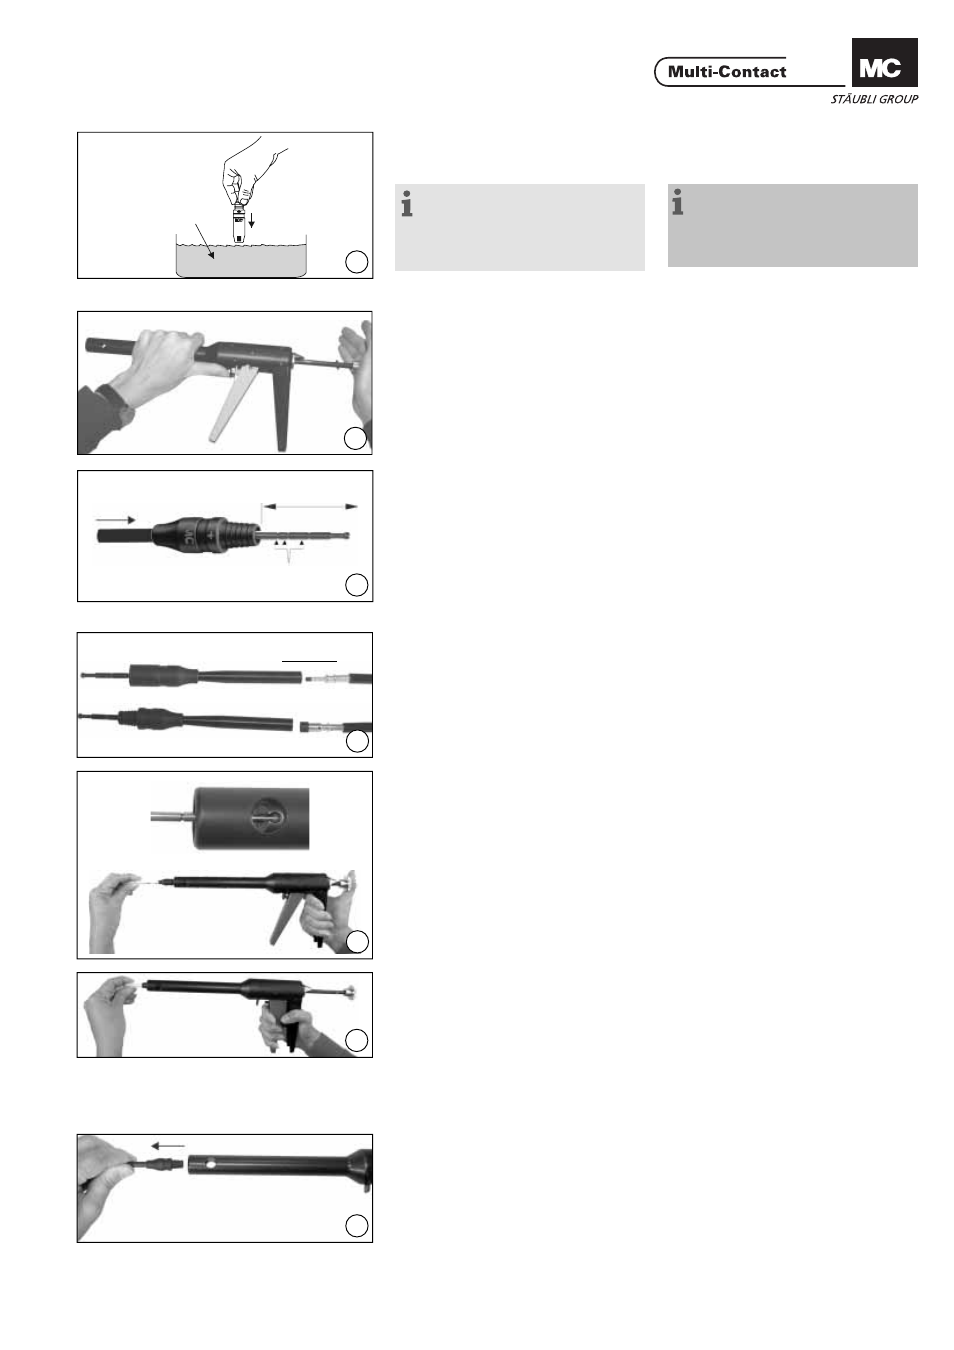
9
Montage
Assembly
(ill. 9)
Remarque:
L’emmanchement des contacts
peut être facilité en plongeant au
préalable des corps isolants dans de
l’alcool industriel.
(ill. 9)
Note:
You can facilitate the assembly pro-
cedure by immersing the connector
insulators in industrial alcohol before
inserting the contacts.
(ill. 10)
Tenez l’outil de montage par la partie
avant. Poussez le levier de rappel R
dans la direction de la fl èche avec le
pouce et poussez simultanément la
tige de traction Z jusqu’en butée avec
l’autre main.
ill. 10)
Hold the assembly tool by the pull-in
tube.
Press the return lever R with the
thumb in the direction of the arrow
and at the same time press in the
puller rod Z to the limit with the other
hand.
(ill. 11)
Sélectionnez le cône:
• PV-KO3 II pour isolations de douille
et fi che de taille IIA
Pousser le cône par l’arrière à tra-
vers l’isolation de douille ou de fi che
jusqu’à ce que la tige de traction
dépasse de 40mm.
(ill. 11)
Select the appropriate tapered spindle:
• PV-KO3 II for male and female coup-
ler insulators of size IIA
Push the tapered spindle from behind
into the male or female insulator until
the puller rod protrudes from the male
or female insulator by approx. 40mm.
(ill. 12)
Introduisez la douille ou la fi che avec
le câble serti dans le cône.
(ill. 12)
Insert the male or female coupler
with crimped-on lead into the tapered
spindle.
(ill. 13)
Introduisez le cône dans l’outil de
montage et accrochez-le au support
de cône tout en maintenant la tige de
traction.
(ill. 13)
Insert the tapered spindle into the
assembly tool and attach it to the
spindle holder. During this operation
hold the puller rod in position.
(ill. 14)
Actionnez plusieurs fois la poignée
de l’outil pour tirer le cône à travers
l’entrée de l’outil tout en maintenant
le câble avec une légère pression dans
le cône, jusqu’à ce que la fi che ou la
douille s’enclenche dans l’isolation.
Retirez complètement le cône de
l’isolation.
(ill. 14)
Actuate the handle of the tool several
times. This pulls the tapered spindle
through the infeed opening of the
tool. Apply gentle pressure to keep
the lead in the spindle until the male
or female coupler part engages in
the insulator. Pull the tapered spindle
completely out of the insulator.
(ill. 15)
Retirez la douille ou la fi che de l’appa-
reil de montage.
(ill. 18)
Withdraw the male or female coupler
from the assembly tool.
Rainures / Grooves