Casio GRAPH 25+ Pro Manuel d'utilisation
Page 344
20051101
u To configure an EA-200 setup using Setup Wizard
Before getting started...
• Before starting the procedure below, make sure you first decide if you want to start
sampling immediately using the setup you configure with Setup Wizard, or if you want to
store the setup for later sampling.
• See sections 6-1, 7-1, and 8-1 of this manual for information about procedures required to
start sampling and to store a setup. We recommend that you read through the entire
procedure first, referencing the other sections and pages as noted, before actually trying
to perform it.
• To terminate Setup Wizard part way through and cancel the setup, press
!J(QUIT).
1. Display the E-CON2 main menu (page 1-1).
2. Press
1(SET) and then 1(WIZ).
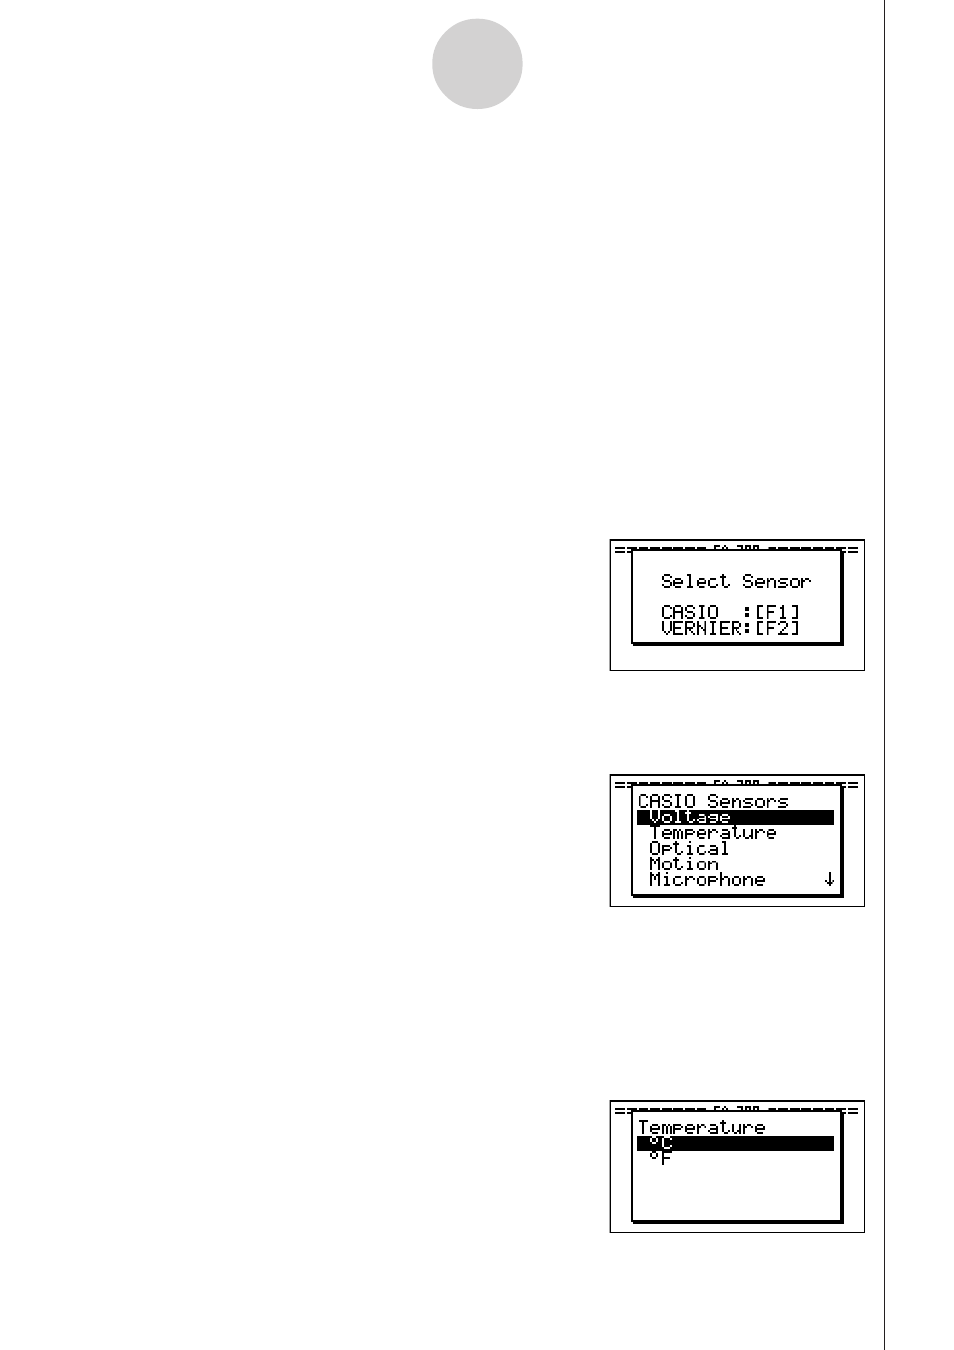
• This launches the Setup Wizard and displays the “Select Sensor” screen.
2-2
Using the Setup Wizard
3. Press
1 to specify a CASIO sensor or 2 to specify a Vernier sensor.
• Pressing either key will display the corresponding sensor list. The following shows the
sensor list that appears when you press
1.
4. Specify the sensor you want to use.
Use the
f and c cursor keys to move the highlighting to the sensor you want to use,
and then press
w.
• If the sensor you specified has more than one option (more detailed specifications, such
as sampling unit, mode, etc.), an option list will appear on the display at this time. If this
happens, advance to step 5 (where you will see an example of the screen that appears
when you select
1 - [Temperature] in step 4).